Tutorial - Positioning
Now that we know how to create our first little 'Hello, World!' example we need to know how to position our elements at different parts of the screen, not just the center.
Let's go over some of the basic positioning commands and what they do. We will use a simple rectangle to show how the different commands and their potential combinations affect the positioning of objects within their parent's bounds. The parent is sized exactly to the scale of the grid. In this specific example the rectangle is 100x100 and the parent 500x500.
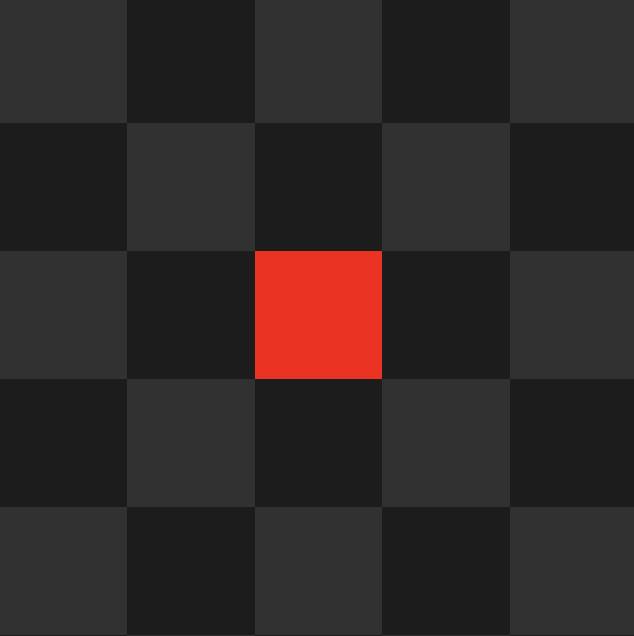
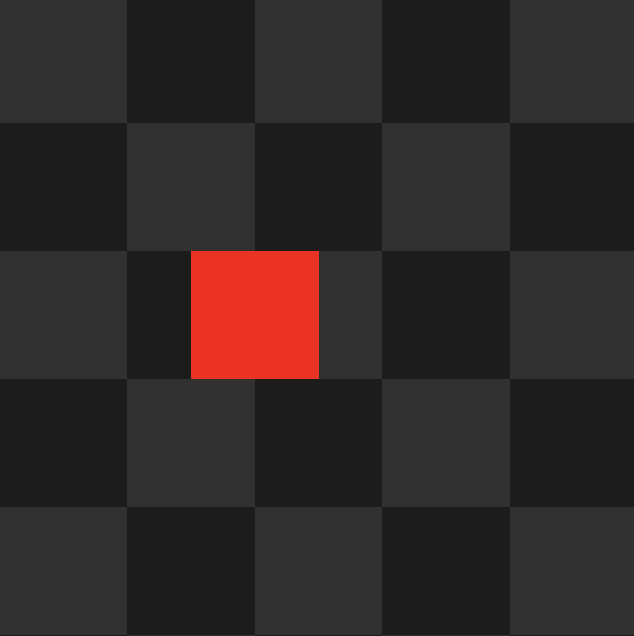
Default at (0,0)
Pos(Vector2) / Pos(float, float)
sets the anchored position of the element. The anchored position always describes the position coordinates relative to the objects direct parent. The first coordinate describes the x, the second the y direction.
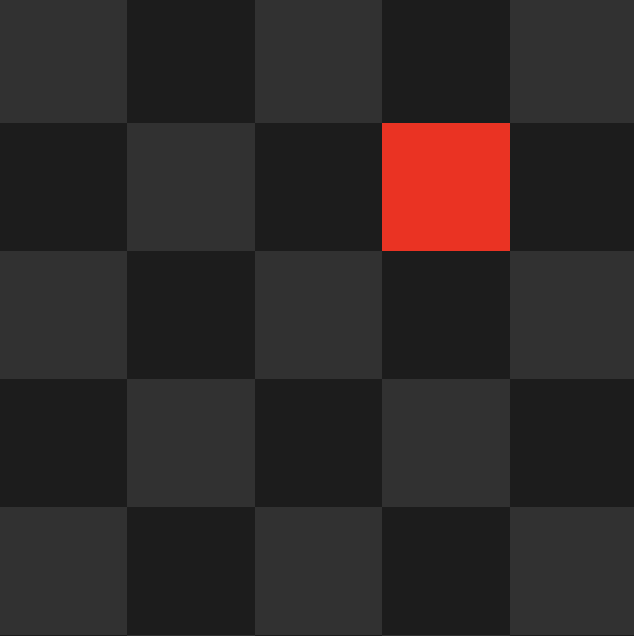
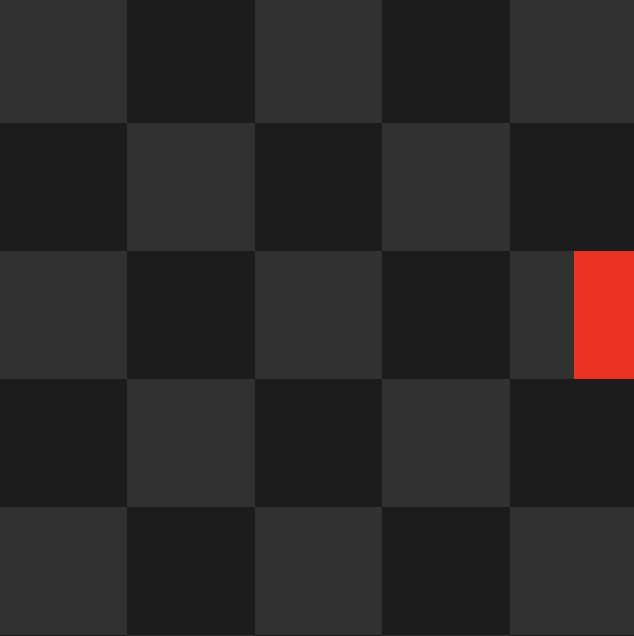
Pos(100, 100)
Offset(Vector2) / Offset(float, float)
offsets the anchored position of an element relative to its current position.
You can also use the shorthands OffsetY(float) and OffsetX(float) to add offset in only one specific dimension.
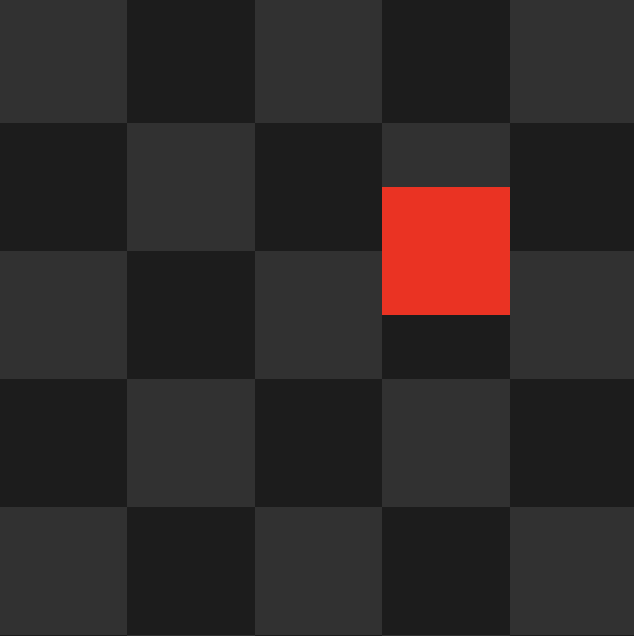
Pos(100, 100) + Offset(0, -50) = (100, 50)
Pivot(PivotPosition, bool?) / PivotPosition(Vector2, bool?)
sets the pivot of the object. Can be a combination of fixed pivots in the vertical
(Upper, Middle, Lower) and horizontal (Left, Center, Right) directions, or
a custom Vector2.
Set the bool alsoMoveAnchor to additionally move the anchor of the object itself.
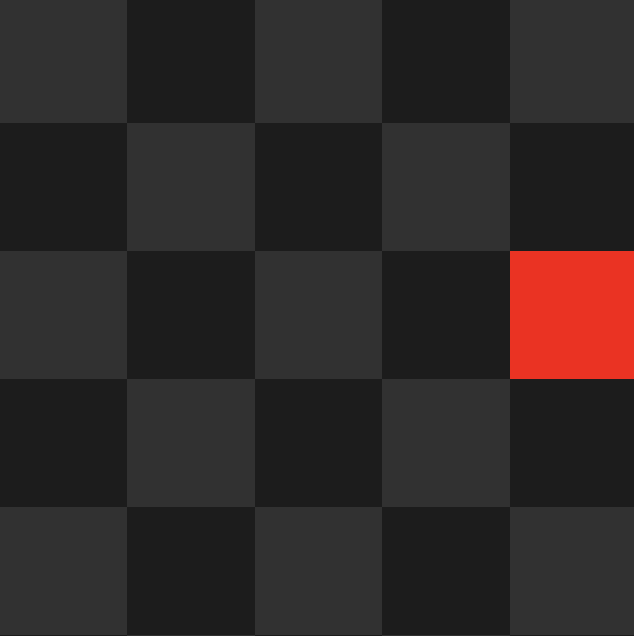
Pivot(PivotPosition.MiddleRight, alsoMoveAnchor=true)
Pivot(PivotPosition.MiddleRight, alsoMoveAnchor=false)
As you can see in the image above, the square didn't actually move to the right edge after we set its pivot. This is because we only set the pivot point, not the anchor point. As the RectTransform did not change its coordinates, it as to visually reflect its new interpretation of a right-centered pivot at (0,0). This results in the right edge now being at the origin, seamingly shifting the square to the left.
AnchoredTo(PivotPosition)
sets the anchored position of the object itself.
As you can see in the example below, moving only the anchor results in the origin aligning with the right edge of its parent. As the pivot is centered on the square, this leads to use only seeing the left half of it as the right half is out of bounds.
AnchoredTo(PivotPosition.MiddleRight)
Combining these simple, yet powerful, commands allows for arbitrary positioning of your objects in your UI. It's best to just start and try out some combinations and see where it gets you.
Below you can expand the box to find the code for this setup. Simply modify the positioning of the red square and try understanding how each command affects its position!
Code for this Setup
    /* Grid Background */
    UI.Grid(GridLayoutGroup.Constraint.FixedColumnCount, 5, grid =>
    {
        grid.CellSize(100, 100);
        for (int y = 0; y < 5; y++)
            for (int x = 0; x < 5; x++)
                grid.Add(UI.Image((x + y) % 2 == 0 ? Color.gray2 : Color.gray1));
    }).Parent(canvas);

    /* Parent */
    var parent = UI.Image(Color.clear).Parent(canvas).Size(500, 500);

    /* Square */
    UI.Image(Color.red)
        // TODO Positioning
        .Parent(parent);
For more information about the UI.Image initializer and other UI elements
continue following the tutorial :)
Let's go over what we have learnt in this section:
- Basic positioning commands for UI elements
- Combining positioning commands can create new visual states.
- Sneak peek into
UI.ImageandUI.Grid.